
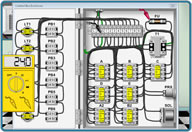

Machine vertical Axis Brake systems for your CNC machine tool |
|
|
|
|
Possible causes
|
|
| Early symptoms of brake failure or need for adjustment
When power is cut off or ESTOP is pushed the head will drop a noticeable amount. Usually if the brake is working properly you will not see the head drop. Also if you look at the brake disk area you may see some dust around area which may be signs of wear. |
|
| Checking the brake gap
Check the gap with a feeler gauge .004" between the brake disk and top plate. Make sure you check all the way around. It should be even and the gap should be no more than .008". Preferably between .004 and .006. Push the e-stop in, pull it out and hit control on button and recheck to see if bottom plate is pulls down. If it is, check electrical circuit first, the order brake if necessary. |
|
|
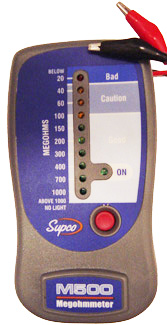
Testing electrically Check for power- Make sure machine is out out of an alarm state and powered up all the way before testing. Check for Power at brake or terminal strip closest to brake. Brakes are usually 24vdc or 100vac . Assuming 24vdc. If there is 24vdc at the brake it should be pulled down all the way. Some circuits have a 24vdc initial surge, and then drops down to a lower voltage to hold plate down. Voltages required may vary so check in the electrical circuit diagrams. Some machines have a variable or fixed resistor in the circuit that can be adjusted to increase voltage. Some times it may be easier to take two pry bars and force the bottom plate done to the coil to see if it keeps it held in. If it does the initial power surge may not be pulling it down. Check for open in coil- Disconnect the brake wire leads. Set ohm meter to ohms and place one probe on each wire. Ohms is generally from 10 to 100 ohms, usually under. |
|
|
Adjusting the brake gap Extremely important Warning Use extreme caution when working on an axis brake. Spindle heads and turrets will drop like a rock causing series injury and severe damage to machine. Check to see if axis drops run axis in rapid up and down and put hand on brake to see if it is warm |